Showing posts with label #MechaMonday. Show all posts

Monday, October 7, 2024

#Mechamonday for October 6th - Locust Again

I managed to complete 3 more Locusts, plus three other mechs. They need some sprucing up, I expected the colors to be brighter.  

As you can see, I use wine corks and sticky tack to mount them. 

If I had time for another project, I'd make a photography station. 

Monday, September 23, 2024

Stupid Solution to Stupid Problem #MechaMonday

I've been working on a few Battlemechs for my Thursday outings to Kingpin Comics and Games. However, I own two 100-ton cats. They are beasts. They keep knocking my painted mechs off the shelf. 

They are savage. They skip the unpainted ones. 

I came up with a stupid solution to a stupid problem. I put the models in a terrarium I had in the garage. 


They've tried half a dozen times to get up there and they can't fit. Problem solved? 

Monday, September 16, 2024

#Mechamonday for September 16th - Locust Again and Home Improvement

As mentioned before, Locusts are one of my favorite mechs. In the image to the right, the painted Locust sculpt is from the Battletech Alpha Strike Boxed Set. There is no official source for more figures, so I purchased a few from Etsy.

Here is the link I used. I am not an affiliate of Etsy or this seller. I just like the product. I gave it 5 stars, I honestly couldn't be happier with these mechs. 

You'll notice these are variants, with long gun barrels on the arms and no chin cannons. When they arrived, I thought of cutting the guns off to match the other model. The obvious bend in the barrels bothered me to. 

I couldn't do it. I want them as they are. 

I decided to fix them. These are obviously resin printed, so fixing them is relatively easy and the technique works on many types of plastic models. 

Step one: get a cup of very hot water. I've seen people say it must be X degrees and then they name some arbitrary number below boiling. 

Stop. Let me offer some free home improvement advice then tell you about using hot water to bend plastic. 

You have three basic choices of water heating: on-demand, electric, or gas. If you have on-demand hot water, you can skip this because that will make as much, and as hot as you like water until the fuel runs out. If you heat water by gas or electricity you have a hot water battery in your home called a hot water tank.

Modern hot water tanks have two heating elements, one at the top and one near the bottom. The cold water comes in from the bottom of the tank and is heated by the first element. The hot water rises and is kept at temperature by the upper heating element. Cold water comes in to replace it and the process continues. This is actually kind of neat. When not in use, the water starts as a column of cold to hot and turns into a column of nearly uniform temperature water. 

Have you ever noticed that your water comes out cool and warms up over time? That is two different processes at work. The obvious one is the water in the pipes is cooler than the water in the tank. The second process is as the tank replenishes the flowing water, and eventually, both heating elements turn on. 

This is very efficient. This is also why I say not to use the hottest water possible for bending plastic. You won't be able to control how hot it can get consistently because of the heating elements. 


If you notice you burn yourself at the sink when the dishwater or shower is running, turn down your hot water tank temperature. It's too hot. Remember, the shower will dump water over your head even if it's too hot. Second, turning the temp down can save you enough over a month or year to buy another mech. 

This ends my home improvement section. 

Ok. Get a cup of hot as you can tolerate water. You'll be holding your fingers in it for about 30-60 seconds. Plan accordingly. 

The reason for no specific temperature is, I don't know what kind of resin you are dealing with and I don't want you to melt it to slag. Repeating this process several times is better than destroying a model with very hot water. 

Also, get a cup of cold water. Again, not as cold as you can get it, but cool.  

Initially, I held my model in the water for a minute. Next, I bent the gun outwards and dipped it in the cool water. In the picture to the left, you can see the guns are less bent but not entirely fixed. 

I repeated the process. Since the water didn't damage the models, I felt comfortable dropping all three into the hot water and repeated the process. 

After the next dip, I thought they looked good enough. I might do it again before priming the models. 

This technique works well with bent airplane landing gear, drogues, and antennas. You may give it a try on slightly warped larger pieces, but only if you can press the model's complex shape against an opposing shape. I have yet to fix a model where 2 halves of the model are warped by pressing them up against each other. 

It is always too much flex to work but you may have better luck. 

As always, you can pick up a copy of this game on DrivethruRPG, but if you hit up brick-and-mortar stores, you can get the physical copy with minis. I will be doing a review of my favorite place to shop and play Battletech soon. 


Monday, September 9, 2024

#MechaMonday for September 9th - Commando

The Commando is a light mech and missile boat. It's an interesting option, as it pairs a single laser with two different missile racks. The range is short and shorter, but it's cheaper than a Locust. And there is something to be said about a low-heat mech. 

The Commando Gallery


You can pick up a copy of this game on DrivethruRPG, but if you hit up brick-and-mortar stores, you can get the physical copy with minis. 

Monday, September 2, 2024

#MechaModay for September 2nd - The Archer and The Locust

 #MechaMonday is here and I am leading with my two favorite mechs - The Locust and The Archer. 


It's been years since I have painted and I started right in with camouflage. We'll see how that goes. I'll get better pictures up soon. 

The reason I like these two mechs is you can get a 2:1 movement ratio. Sure there are pairs of variants that do not have this ratio, but you have to look for them. You can start advancing with the Locust zig-zagging while the Archer lumbers along behind. 

Thanks to the variants, you can pretend to be something you aren't by moving slightly slower. This shouldn't work by the rules, but it sidesteps the rules by repetition. If they see you move 8" and 4" every round, they will assume that you will in the future. The rules don't assume for player assumptions.   

This creates many possible attack positions for the pair: 
  • The Locust can move in lockstep with the Archer, forcing your opponent to pick between a sure kill on the closer Locust or trying to kill the distant Archer.  
  • The Locust can dash through the enemy and end up at their rear or better, a flank. 
  • The Archer can dash forward and end up slightly in front of the slowing Locust.  
  • The feint is a good gambit, where the Locust moves to one side dragging the enemy around so the Archer can turn to face a different foe or objective.  
This combo is costly in terms of Locusts but you can wreck formations, cut off individual mechs or make fancy powerplays with low-end mechs. Personally, I like the satisfaction of getting the Archers in front of the Locusts because my opponent has to sweat the dice to kill an Archer while worrying about what the Locusts are really doing. Even if they aren't doing anything.  

The Archer Slide Show


The Locust Slide Show


You can pick up a copy of this game on DrivethruRPG, but if you hit up brick-and-mortar stores, you can get the physical copy with minis. 

Tuesday, August 27, 2024

Missed It Monday!

Yup, I had an idea and I blew it. I wanted to do Mech Monday and missed it by about 36 hours. I've been gearing up to play Battletech Alpha Strike at Kingping Comics & Gaming. They play every Thursday night. It'll be about 3 weeks until I get enough models painted.

I have a collection of my favorite mechs I'd like to do up. I have 4 Archers and a pair of Locusts. I have 3 more Locusts on order. I hate that I have to rummage through the internet for Locust models. Catalyst is weird because their store isn't very comprehensive. 

These will sport Jade Falcon livery. 

I can't wait. 

 You can pick up a copy of this game on DrivethruRPG, but if you hit up brick-and-mortar stores, you can get the physical copy with minis. 

Monday, August 12, 2024

Mecha Monday - August 12, 2024

I am not where I wanted to be in my comeback, but I am not terribly surprised. Last week was Kitty's Big 50th Birthday. This week is what I like to call "Our 23rd Annual Anniversary". Kitty hates this. 

I also need a haircut. 

The laser is starting to consume all of my free time. I am planning several projects: coasters, plaques, and such. Kitty has requested a couple of Lake George-themed coasters and maybe a map. 

I know I've mentioned Lake George a few times. It's our favorite place to be and we go there 2-3 times a year. We usually travel in 3 seasons: summer, fall, and winter. Spring is too wet for fun while fall is crisp and cool, and the trees are colorful. 

Given the chance we'd move there. 

These first few projects need a couple of preliminaries. I have downloaded an old map and engraved it on a sample wood tile. The tile is much too small for this map and the text is a string of dots. I could have cranked up the laser's power, too. 

The image is also crooked. 

The second preliminary is a target mat for the laser. The laser bed is 400 mm by 415 mm (15.748 inches by 16.3386 inches). Since the whole thing is light and mobile, I need a mat and template so I can line up objects on the bed corresponding to images in the files.  

So that was next. If you blow up the image, you'll see a light gray grid. The file I used to create this image can now be the template for future images.

The target material is a yellow posterboard. In case you are wondering, the settings I used was: 

Power: 3% to 6%. 
Speed: 6000 mm a minute.
Air Assist: Off.   

Each line is 25 mm a part. 

That got me thinking of a new project. I could burn my own maps on to paper. What I really need is a Battletech Map.  

Hmm. That was one long segue into Mecha. 


Yes, I bought more unpainted Mechs! 

The Wolf's Dragoons Assult Star contains an Annihilator, Timber Wolf, Rifleman, Archer, and Blackjack. The two Inner Sphere Command Lances contain an Archer, Marauder, Valkyrie, and Stinger. 

While my favorite mech is the Locust, which seems to be unique to Battletech, my second favorite mech is the Archer, an unseen mech. I can't wait to get painting. 

My favorite local comic shop, Kingpin has a weekly Battletech: Alpha Strike game. Last time I played, I kicked ass. I slaughtered the opposing force. It was my first time playing against 3 guys who play weekly. 

My "slaughter" was not due to any skill but the fact they went after each other for an hour with hammer and tongs, ignoring me. At the end of the game, there were 26 dead mechs. I had 6 mechs surviving. I can't wait to get back and play for real. 

Monday, February 6, 2023

Operation Spartan Restoration

I started restoring my Mechs tonight. I picked one and ran with it. 


The tools and supplies are rather basic. I used a fine-point sharpie instead of the pencil I normally use for photo quality. I also needed a razor and a couple of files. For glue, I used Tacky Glue and Superglue together, which is an interesting trick. 

The final item is the material needed to resculpt the arm, a piece of soapstone. This product is found in the welding supply section of your local hardware store. Soapstone is incredibly soft yet heat resistant, which means you can mark materials and hit them with enough energy to melt metal without burning up your markings. 

It comes in two forms, a flat bar, and cylinders that fit into a pen-like holder. The cylinders are nice for columns and such. 

The first thing I did was roughly trace the arm I wished to sculpt. It doesn't have to be a work of art AND it needs to be bigger than the arm you want. 

Soapstone has a grain just like wood. Unlike wood, it is remarkably honorable to your tools, meaning you can push and pull against the grain. What soapstone does not like is compression or impact. It will shatter like very soft glass. 

Whittling down this one piece took about 15 minutes most of which was spent taking pictures. One item I did not mention was a plastic bag to sweep all of the dust and fragments into. I didn't take a picture of that because it looks like a bag of crack. 

I try to roughly carve the arm down to the right size and proportions. Notice that I don't cut the arm away from the larger piece. It's too small for that. 

I used a mech to size up the arm as I work. Luckily, I have mechs with broken right and left hands, so I have a model to work from. 

Once I am down to the right size and proportions, I carefully... Carefully... cut the arm away from the bar. When making these cuts I work my way into the bar, not away from it. 

These are actually cuts, every bit of work so far is with a razor. This is the other reason you don't remove the piece from the bar. You'll have nothing to hang on to and cut yourself. The other devastating disaster is dropping the part on the floor and chipping it so badly it's useless. 

I skipped all of the pictures of sanding with files. It's super boring to look at. A file will knife right through soapstone, so go slow. You can't exactly put the material back. 

Well, actually you can add material back but it is annoying, time-consuming, and labor-intensive. It also makes fine-tuning your model very difficult. 

Remember the bag of soapstone dust and chips? You can apply layers of glue to the damaged portion and add soapstone chips and dust to it. The problem with this methodology is it takes time to dry and the glue/stone laminate is really tough stuff. Filing becomes much harder. It's also super sad if the glue slips off the model and you have to glue it back on a second time. Thankfully, the glue and soapstone mix will keep it's shape, it's only annoying. 

Anyway, the last step is to add the details, like the etched-in lines. You can get remarkably detailed in this work, like scrimshaw on ivory. You might be tempted to use a razor to do some of this work. Don't. Instead, use a pin with a handle. I personally like removing a rubber eraser from a pencil, shoving a pin through it, and gluing it back into place. 

In order to mesh the parts up, I filed the metal of the model down into a V-shaped point and did the reverse on the soapstone part. This increases the surface area and allows you to feel when the part is in the right place. I've shown you the final image, but I want to show off one more trick with the second last image. 


See the white spot of glue on the metal model? That isn't just glue, it's soapstone powder on the tacky glue. I put the super glue on the soapstone part and touch them together. There is a quick chemical reaction between all three substances and the dry time is about 5 seconds. It's pretty cool. 

I am saving another trick for my next post. See you there. 


Monday, December 20, 2021

Mecha Monday - 12-20-2021

I think I know what I'll be doing for next year's weekly series: Mecha Monday. I've let a lot of things go this year, but I've also hung on to a lot of things. Somehow I completed my 52 weeks of reviews in 2021 and I am very proud of that. A weekly blog post seems to work best for me and the simpler the better. In fact, this post and the next will tag off of that. 

My next review will be of the Battletech: Beginner Box. 

I was hoping to do something like #monsterousmonday, #mechmonday, or #miniaturemonday but some of my skills have slacked off in the past year. For example, I let my drawing skills slack off which also impacted my painting ability. Basically, they are the same skill with two different types of media. 

rough... really rough
To get back on track, I'll be doing #mecha2022 because it involves fun games and ties into my art skills. 

Mecha are amazing because there are so many different kinds. And they lend themselves to the exploration of ideas and concepts. They can be rude like the image to the right or more polished like the image below. Both are the same Mecha, an Invid from Robotech. 

Of course, Robotech mecha aren't the only kinds out there. A more realistic rendition of giant killer robots are the Battlemechs from Battletech. My personal favorite mech is the Locust. 

It's like a Jeep on steroids and legs. What isn't there to like? 

Anyway, 2022 is coming and I am ready to go. I hope you follow along with me. 


Thursday, January 19, 2017

A not so #miniaturemonday post - Figures with Flair - January 18th, 2017

I missed #miniaturemonday, but I do have some figures to show off. Please excuse the blur as I haven't had time to get out the nice camera.

First, two D&D figures.

This rogue is one of my favorites. He is based off of Jubal in the Thieves World series of books. He has a bit of grey hair and a multi-colored outfit. He holds a dark colored staff.

I wish I could remember the manufacturer of this figure. This figure is pretty old, and the base shows signs of age. I will likely rebase this figure and give him a new coat of gloss coat.

I especially liked doing the mismatched green and red. for his sleeves. It's a hint of flair for an otherwise normal rogue.

From about the same time period, I have a simple bard with lute. He was my character in several AD&D adventures.

When my friends and I played AD&D, we rotated turns as DM and had a shared world. It was rather interesting as your "main" would become an NPC. One of our rules was to have NPC acquire wealth and experience, but never any magical items.

As a result of this rule, we had many game breaking characters and magic items. The main issue was not power creep as you would expect, but a combination of unique magic items and the courtesy of returning favors. The end result was a bunch of characters with very non-standard gear in large amounts as six DM's doling out goodies was a little too much.

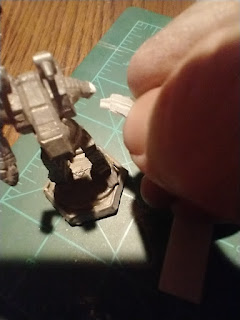
The last item is a cool "unseen" mecha from Battletech. As you can see, he has taken a lot of damage. Before painting this figure, I took a Dremel to the nose and wing. I then washed a propane torch over the entire figure to give it a bubbled and softened look, as if it had walked through fire.

The figure rippled a little too much under the torch, but I still liked the effect.

I would imagine that the pilot was lucky to be alive as the cockpit was very nearly holed. I like figures with character that hint at a little background and story.


Monday, January 9, 2017

#MechaMonday January 9th, 2017 - Adeptus Titanicus

In the process of cleaning out my basement, I have come across some wonderful old figures. Back in the 1980s I recall spending many weekends playing Adeptus Titanicus. As near as I can tell, this game came out in 1988.

All that I have left of the set is the rule book sans cover and 8 Titans, only 2 of which are painted. I believe the set came with 8-12. I'd love to get my hands on more.

Lately, I have painting Space Marines. When I finish those I hope to move onto these Titans. So many toys, so little time.


Monday, June 20, 2016

#MechaMonday

I saw some posts for #MiniatureMonday and decided to share a few of my own. Obviously, I like mecha.