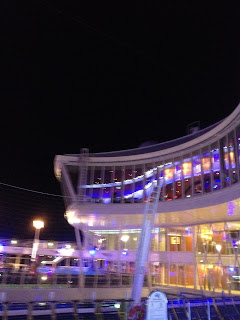
Back in 2014, I had the chance to sail on The Oasis of the Seas. It was amazing.
Our destination was the Bahamas, Nassau in particular. What a beautiful island. I can't wait to go back.
 The Oasis of the Seas is a new ship, first sailing in 2009. It has 16 passenger decks, a casino, 5 pools, a carousel, chapel, a library, and dozens of other features. Our trip was only 3 nights, so obviously I couldn't see everything they had to offer. I never set foot in a bar and was only able to breeze through the shopping areas. On the deck was a massive amphitheater which also served as a rally point. As big as it was, I only saw it once.
The views from the ship were incredible. Even in port, the sights were amazing.
My wife and I were traveling with three small children and we were new to the ins and outs of cruising. My mother-in-law guided us through the process. Thank god for that, we would have been lost.
 Even still, the Oasis was big enough to swallow us up even with help. One evening, my daughter and I got lost on the ship and found ourselves in the chapel, then a library and finally, a wonderful viewing point at the top of the ship. It was overwhelming.
 The Oasis of the Seas is a massive ship. We could sail on that three more times and likely not see it all. Next time, we may take a longer cruise on a smaller ship. Or not. Depends on where we want to go. I would love to sail on the Oasis again.
Having said that, my mother-in-law is a great planner but not a professional planner. We keep telling her she should be. Maybe someday she'll retire to that life. In any event, my wife and I have a friend, Jaime Nowicki who is a travel planner. She loves Disney but also handles trips to other locales, too. Of course, Disney Cruise Line is one but she also plans for Sandals, Beaches, Royal Caribbean, AMA Waterways, Azamara, Celebrity, Carnival, MSC Cruiseline, Norwegian, American Cruise Line, Princess!
 My dream trip would be to Cuba. My wife, Kitty's dream is to go to England and Ireland. We need someone like Jaime to manage these dreams and give a plan that is both incredible and budget friendly.
You can find Jaime on Facebook or Twitter, or contact her by email or phone at:
716-491-9980
j dot nowiki at magicalvacationplanner dot com
Of course, there is a website, too.
 The Oasis of the Seas is a new ship, first sailing in 2009. It has 16 passenger decks, a casino, 5 pools, a carousel, chapel, a library, and dozens of other features. Our trip was only 3 nights, so obviously I couldn't see everything they had to offer. I never set foot in a bar and was only able to breeze through the shopping areas. On the deck was a massive amphitheater which also served as a rally point. As big as it was, I only saw it once.
The views from the ship were incredible. Even in port, the sights were amazing.
My wife and I were traveling with three small children and we were new to the ins and outs of cruising. My mother-in-law guided us through the process. Thank god for that, we would have been lost.
 Even still, the Oasis was big enough to swallow us up even with help. One evening, my daughter and I got lost on the ship and found ourselves in the chapel, then a library and finally, a wonderful viewing point at the top of the ship. It was overwhelming.
 The Oasis of the Seas is a massive ship. We could sail on that three more times and likely not see it all. Next time, we may take a longer cruise on a smaller ship. Or not. Depends on where we want to go. I would love to sail on the Oasis again.
Having said that, my mother-in-law is a great planner but not a professional planner. We keep telling her she should be. Maybe someday she'll retire to that life. In any event, my wife and I have a friend, Jaime Nowicki who is a travel planner. She loves Disney but also handles trips to other locales, too. Of course, Disney Cruise Line is one but she also plans for Sandals, Beaches, Royal Caribbean, AMA Waterways, Azamara, Celebrity, Carnival, MSC Cruiseline, Norwegian, American Cruise Line, Princess!
 My dream trip would be to Cuba. My wife, Kitty's dream is to go to England and Ireland. We need someone like Jaime to manage these dreams and give a plan that is both incredible and budget friendly.
You can find Jaime on Facebook or Twitter, or contact her by email or phone at:
716-491-9980
j dot nowiki at magicalvacationplanner dot com
Of course, there is a website, too.


